Bottom-Up Window Blinds and Skylight Shades: Part 3 - Frame Assembly
In the previous article we looked at cloning an existing remote control channel to the ShadeSlider™ motor. In this article we'll take a look at assembling the frame and motor belt drive system.
The process of assembling the ShadeSlider™ frame is straightforward and mainly consists of joining the sides with the top and bottom sections. The first picture shows the general layout, repeated from the first page in this series:
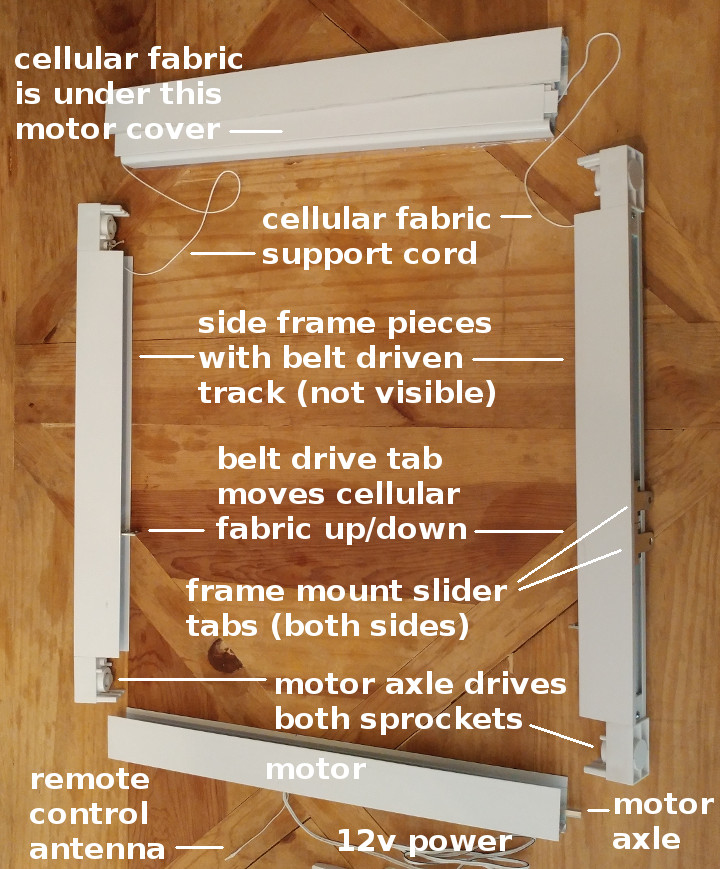
(1) Insert The Belt Drive Tab Into the Hem Bar:
The motor is pre-set to the FULLY OPEN travel limit (the cellular fabric is fully compressed). The drive tab should be inserted into the bottom of the hem bar, as illustrated in the following picture:
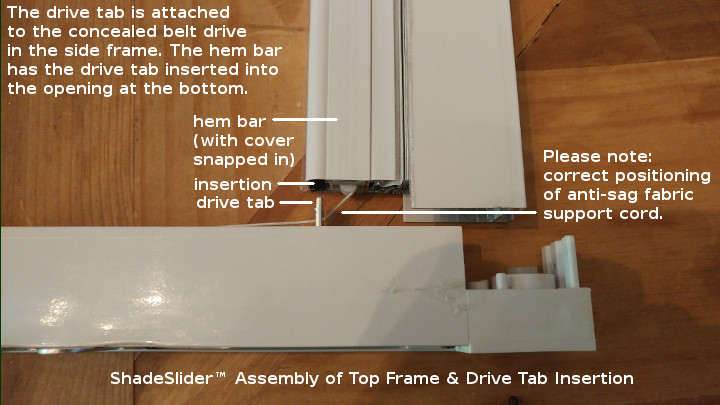
(2) Connect The Top Frame to the Two Side Frames
After you have inserted the drive tab into the hem bar (on both sides), you can connect the top piece to both side frames (the cellular fabric can be expanded to accommodate the corner pieces). You may have to use a rubber mallet or some other softer item to tamp the pieces together for a tight fit.
When that is done, please use 2 of the short screws to fasten the 3 pieces together (screw holes are in the top piece). Here's what it should look like when you are finished with this step:
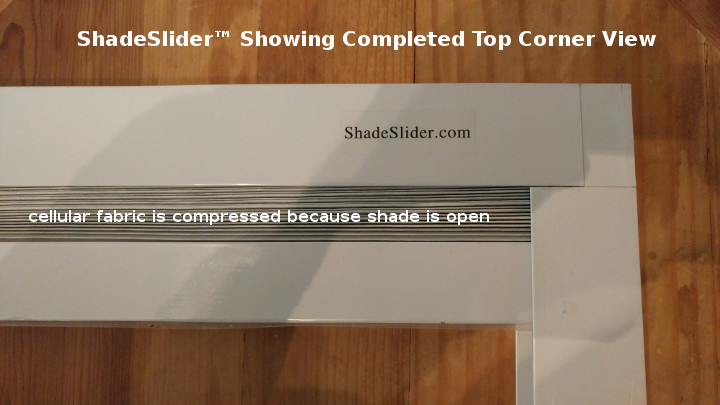
(3) Connect The Bottom Piece With Motor and Drive Shafts
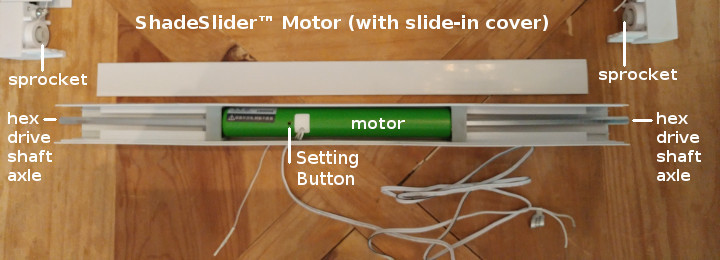
The bottom frame piece houses the motor and hexagonal drive axles that must be mated with the drive sprockets in the side pieces. The motor then drives the concealed belt drive in the side pieces that drags the hem bar up and down. We are repeating the picture from page 1, in case you have not yet slid the motor cover into place:
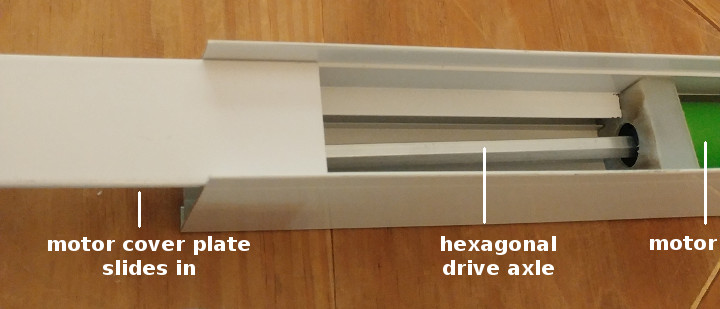
After the motor cover has been slid into place, please connect the two side frames to the bottom frame, ensuring that the hexagonal drive axles are inserted properly into the belt drive sprockets in the side frame; here is a picture prior to assembly:
Here's a picture of what it should look like, just prior to final tamping to close the frame:
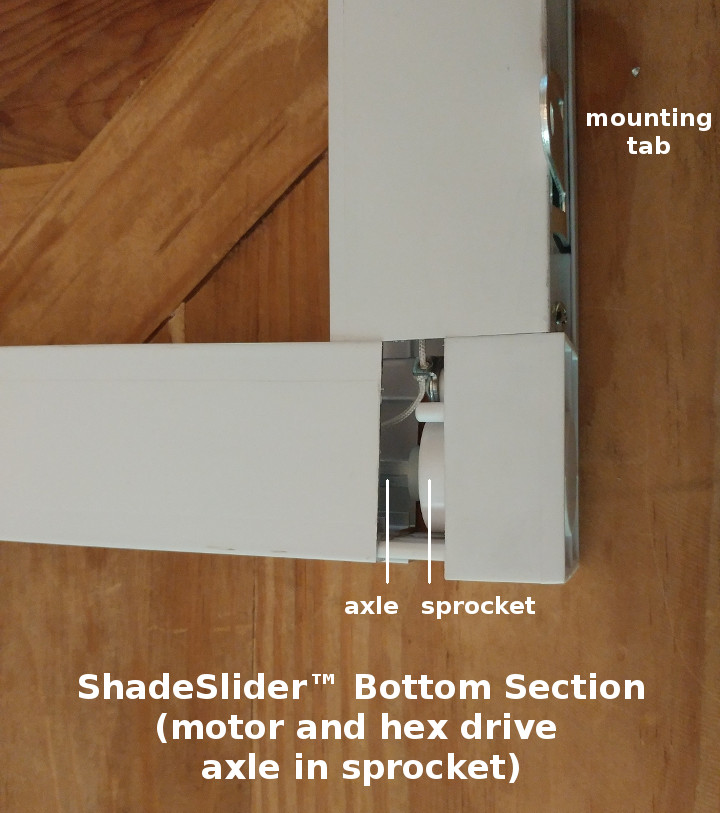
Once you have fastened all 4 corners, you can plug the power supply back in and test it. If you followed the instructions correctly, it should fully open and close, stopping automatically at the pre-set travel limits.
-----------
We sincerely hope you enjoy using these advanced motors; if you have any questions or require pricing, please feel free to contact us at any time!
Articles in this series:
Part 1: ShadeSlider™ Bottom-Up Blind & Skylight Shade: Component Layout, Motor Drive System
Part 2: ShadeSlider™ Bottom-Up Blind & Skylight Shade: Cloning Motor to Existing Remote
Part 3: ShadeSlider™ Bottom-Up Blind & Skylight Shade: Frame Assembly, Drive Shaft Insertion (you are here)
